So, as I have all the components I need for now, it’s time to finish the build!!
Before assembling, one thing to think about is that having taking months to source & refurbish the components, the last thing you would want to do is damage anything during assembly, so care (& the correct tooling) is needed – imagine if you had just had your frame lovingly resprayed / refurbished only to scratch the paintwork fastening a component clamp, it doesn’t bear thinking about 😫
In my case most of the normal clamp culprits are braze-on so not an issue on the Losa, my main concern is fitting the handlebars to the stem.
So many of the handlebars I saw through my component search had the lovely central engraving ruined/disfigured by the standard zig-zag scratches caused by sliding the stem into position and – having bought a lovely set of NOS Ambrosio bars with crest engraving – I wanted to avoid this for my bars.
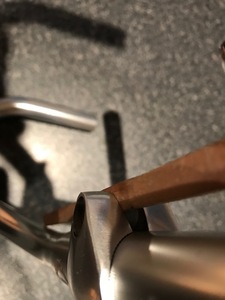
Getting the stem round the bar bends is normally easy enough, however it’s the thicker middle section (where we have the engraving) that we need to be careful as this is – by design – a snug fit.
You can’t make the bars thinner, so the answer is to make the stem clamp temporarily wider.
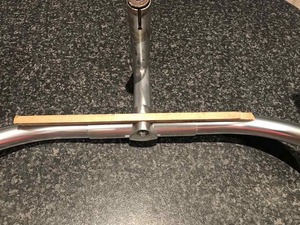
I used a short length of soft wood (about 7mm square) and pushed that between the stem clamp jaws (as seen on the left) just enough so that the stem could easily slip across the engraving. This worked perfectly allowing the stem to slide into place without any damage to the bar engraving.
I was momentarily concerned that sliding the brake levers onto position would cause the same zig-zag effect especially as there is no easy option to make the brake lever clamps temporarily wider (yes I know any damage would be hidden by the bar tape, but I’d know it was there!), however these slid easily into position.
For the most part, the rest of the assembly was relatively straightforward so not a lot to say – took component, fitted it to bike 😀.
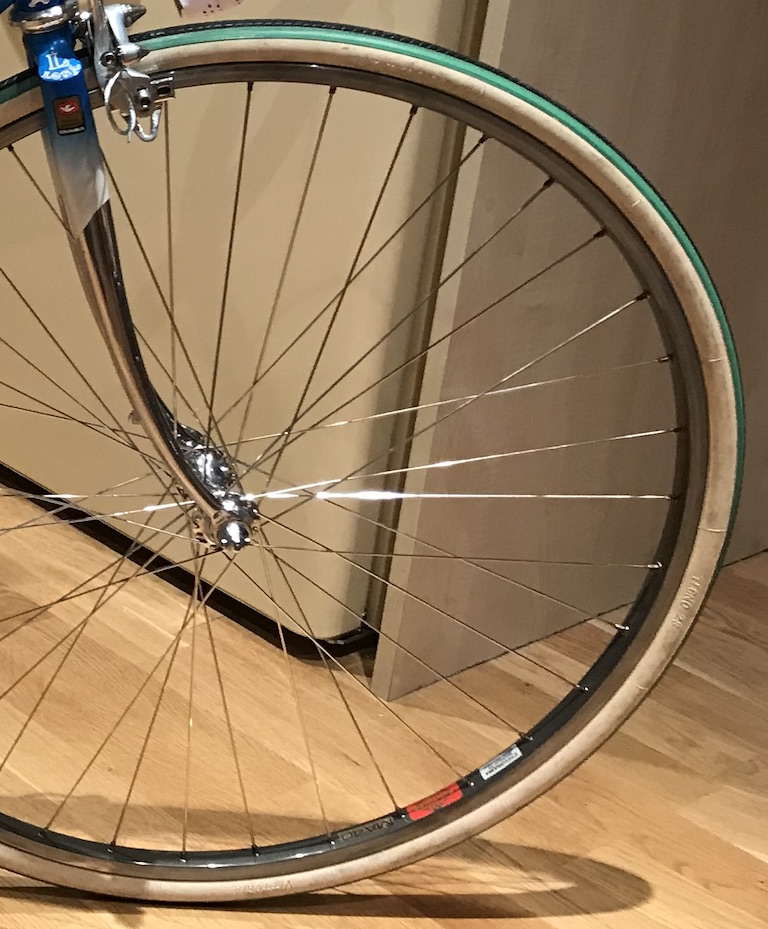 The rear wheel has a threaded hub, so the cassette was screwed on, I’d sourced a set of proper C-Record skewers at the last minute and then I had the set of Vittoria Tecno Twin Tread tyres I’d saved from the original wheels I’d bought – so, all put together they were fastened to the frame.
With the wheels fitted, next up were the handlebars & stem – setting these to the same height as my other bikes – followed by the saddle & seatpost, it being easier to set the saddle height to the centre of the bottom bracket (which I’d fitted some months back) without the crankset attached.
Brakes, rear mechanism and downtube shifters were duly bolted on – I was leaving the front mechanism until after the crankset so I could set the height correctly.
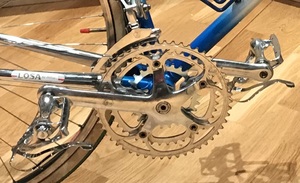
Turning to the crankset, this had been quite scratched & worn but was now beautifully polished (& re-laquered for protection).
I bolted on the rings and then went to fasten the crankset to the bottom bracket, only I couldn’t – although I’d bought (& modified) the special tool to fit the self-extracting bolt to the crank I hadn’t noticed that the bolt itself was not the normal 8mm that nearly every other crank bolt (including other Campagnolo cranksets) uses and of course, is a size (7mm) that’s not part of any normal hex-bolt set!! The purchase of a 7mm Allen-key later, the crankset is fitted and the pedals attached.
And finally, the finishing touches – brake cables (Eroica compliant so over the bars of course), gear cables, bar tape & chain
The build is finished and the bike is ready – how does it look?